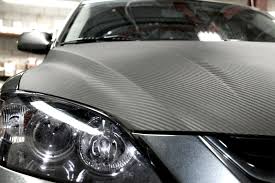
Carbon Fiber Wrap is a popular and cost-effective way to give your car a sleek, modern appearance without the expense of real carbon fiber. This versatile material not only enhances the aesthetics of your vehicle but also provides a layer of protection to its original paint. Wrapping your car with carbon fiber wrap may seem challenging, but with the right tools and techniques, you can achieve professional-looking results. Here’s a step-by-step guide to help you get started:
Step 1: Gather Your Tools and Materials
Before you begin, make sure you have all the necessary tools and materials. You will need:
- Carbon fiber wrap (ensure you purchase high-quality vinyl for durability)
- A heat gun or hairdryer
- A squeegee or application tool
- A sharp utility knife or precision blade
- Isopropyl alcohol and a clean microfiber cloth
- Masking tape
- A measuring tape
Step 2: Prepare Your Car
Proper preparation is key to achieving a smooth and bubble-free finish. Start by thoroughly washing your car to remove dirt, grease, and debris. Once clean, wipe down the surface with isopropyl alcohol to eliminate any remaining contaminants. Ensure the surface is completely dry before proceeding.
Step 3: Measure and Cut the Wrap
Measure the area of your car that you plan to wrap. Add a few extra inches to your measurements to account for trimming and adjustments. Lay the wrap on a clean surface and cut it to size using your utility knife or scissors.
Step 4: Position the Wrap
Peel off a small section of the backing paper from the carbon fiber wrap and carefully position it on the desired area of your car. Use masking tape as a guide if needed to ensure proper alignment. Start from one edge and gradually work your way across the surface.
Step 5: Apply the Wrap
Using your squeegee or application tool, smooth out the wrap as you go to avoid air bubbles and wrinkles. Work slowly and apply even pressure to ensure the vinyl adheres properly. If you encounter any bubbles, use the squeegee to push them toward the edges.
Step 6: Use Heat for Complex Areas
For curved or uneven surfaces, use a heat gun or hairdryer to make the vinyl more pliable. Gently heat the wrap and stretch it into place, ensuring it conforms to the contours of your car. Be cautious not to overheat or burn the material.
Step 7: Trim Excess Material
Once the wrap is securely applied, use a sharp utility knife to trim away any excess material along the edges. Take your time to achieve clean, precise cuts for a professional finish.(Grey Vinyl Wrap)
Step 8: Final Touches
After trimming, go over the entire wrapped area with a heat gun to ensure proper adhesion. Pay special attention to edges and corners. Smooth out any remaining imperfections with your squeegee.
Conclusion
Wrapping your car with carbon fiber wrap is an excellent way to transform its appearance while protecting its paint. With patience and attention to detail, you can achieve impressive results that look like they were done by a professional. Take your time, follow these steps, and enjoy your car’s new stylish look!

